概要
色々あってMacにzabbix_serverを入れて監視サーバをたてる事になった。
Linux系であればパッケージインストールできるが
Macではそういうわけにもいかないのでソースインストールすると
たくさんの罠があったので今後同じ様なタスクが発生した際の備忘録を残す。
前提
Host: macOS 13.5
BuildVersion: 22G74
Zabbix version: 6.4

Web: Apache/2.4.58 #後述しますがMac標準のapacheは使いません
Front: PHP/8.3.1
DB: postgreSQL 14.10
手順
参考:https://www.zabbix.com/documentation/current/jp/manual/installation/install
ソースアーカイブのダウンロード
以下のURLから必要なzabbix versionのソースをダウンロードします。
https://www.zabbix.com/download_sources
ソースアーカイブの解凍
以下のコマンドでソースアーカイブを解凍します。tar -zcvf ${package_name}.tar.gz
postgresとPHPのインストール
homebrew でインストールします。
※apacheは後ほど対応します。
brew install [email protected]
brew install [email protected]
postgresの設定
公式の手順通りやっていけば問題ありません。一応本記事ではDBに入って実施する別の方法を記載します。
参考:https://www.zabbix.com/documentation/current/jp/manual/appendix/install/db_scripts
- DBに入る
cd ${展開したソースディレクトリ}/database
psql -U postgres- zabbix user作成
CREATE USER zabbix; - zabbix DBの作成
CREATE DATABASE zabbix OWNER=zabbix ENCODING=Unicode TEMPLATE=template0; - 初期スキーマとデータのインポート
\i schema.sql
\i images.sql
\i data.sql
configure
configureでMakefileを作ります。
公式に習って以下のコマンドを実施します。
cd ${configureファイルがあるdirectory}
./configure --enable-server --enable-agent --with-postgresql --with-net-snmp
すると以下のエラー
checking for zlib support... no
configure: error: Unable to use zlib (zlib check failed)同様の事象が起きてる様だがこれはzlibが使用出来ない事を示すエラー。
./configure –helpで確認すると以下のような記述がある。
zabbix-6.4.10 % ./configure --help | grep zlib
If you want to specify zlib installation directories:
  --with-zlib[=DIR]       use zlib from given base install directory (DIR),
                          places for the zlib files.
要するにzlibのダウンロード後にconfigure実行時のオプションに追加する事でエラーを回避することが出来る。
また同様の事象がパッケージ名:libevent と パッケージ名:pcre2でも発生するのでダウンロードとオプション追加を行う。
brew install zlib
brew install libevent
brew install pcre2
./configure --enable-server --enable-agent --with-postgresql --with-net-snmp --with-zlib=/opt/homebrew/opt/zlib/ --with-libevent=/opt/homebrew/opt/libevent --with-libpcre=/opt/homebrew/opt/pcreこれでconfigureのエラー解決かと思いきや以下のエラーが発生
config.status: executing depfiles commands
config.status: error: in `/Users/ibsen/zabbix_install/zabbix-6.4.10':
config.status: error: Something went wrong bootstrapping makefile fragments
    for automatic dependency tracking.  If GNU make was not used, consider
See `config.log' for more details
See 'config.log' for more detailsと言ってるので直下にあるconfig.logを見てみると以下の記載
make: ../../.././install-sh: Permission deniedどうやら直下にあるinstall-shの実行権限がないみたいなので与えてあげる
chmod +x install-sh
これにてconfigureが完了。以下の様な結果が返ってくる。 configure結果
Configuration:

  Detected OS:           darwin22.6.0
  Install path:          /usr/local
  Compilation arch:      osx

  Compiler:              cc
  Compiler flags:         -g -O2 -I/opt/homebrew/Cellar/pcre/8.45/include

  Library-specific flags:
    database:                -I/opt/homebrew/include/postgresql@14
    libpcre:               -I/opt/homebrew/Cellar/pcre/8.45/include
    Net-SNMP:               -I. -I/usr/local/include
    libevent:              -I/opt/homebrew/opt/libevent/include

  Enable server:         yes
  Server details:
    With database:         PostgreSQL
    WEB Monitoring:        no
    SNMP:                  yes
    IPMI:                  no
    SSH:                   no
    TLS:                   no
    ODBC:                  no
    Linker flags:              -L/opt/homebrew/lib/postgresql@14       -L/opt/homebrew/opt/zlib//lib  -L/opt/homebrew/opt/libevent/lib    -rdynamic  -L/opt/homebrew/Cellar/pcre/8.45/lib
    Libraries:                -lpq     -lnetsnmp    -lz -lpthread -levent -levent_pthreads    -lpcre -lpthread -lm  -lresolv -liconv
    Configuration file:    /usr/local/etc/zabbix_server.conf
    External scripts:      /usr/local/share/zabbix/externalscripts
    Alert scripts:         /usr/local/share/zabbix/alertscripts
    Modules:               /usr/local/lib/modules

  Enable proxy:          no

  Enable agent:          no

  Enable agent 2:        no

  Enable web service:    no

  Enable Java gateway:   no

  LDAP support:          no
  IPv6 support:          no
  cmocka support:        no

  yaml support:          no

***********************************************************
*            Now run 'make install'                       *
*                                                         *
*            Thank you for using Zabbix!                  *
*              <http://www.zabbix.com>                    *
***********************************************************

zabbix-6.4.10 %
※noとなってるものはzabbixでサポートされないので他にも必要なものがあればconfigure実行時のオプションに追加してください。
make install
make installで作ったMakefileに記載されたinstallを実行していきます。
以下のエラーが発生。
In file included from ../../../include/zbxcommon.h:23:
../../../include/common/zbxsysinc.h:188:11: fatal error: 'mtent.h' file not found
#       include <mtent.h>
エラーの内容を見ると /Library/Developer/CommandLineTools/SDKs/MacOSX13.3.sdk/usr/include/ 配下に mtent.h というヘッダーファイルがないのが問題。ここらへん詳しくないのだがchatGPTに聞いてみるとlinuxでは mntent.h として使用されているようなのでこのファイルをディレクトリに入れて再度make installを実行してみる。
しかしエラーは変わらない。そこでconfigureに記載されている以下の記述を xno から xyes に変える。
ac_fn_c_check_header_compile "$LINENO" "mtent.h" "ac_cv_header_mtent_h" "$ac_includes_default"
+ if test "x$ac_cv_header_mtent_h" = xyes
- if test "x$ac_cv_header_mtent_h" = xno
then :
  printf "%s\n" "#define HAVE_MTENT_H 1" >>confdefs.h
fi
configure を実行し問題再度 make installを実行すると以下のエラー。
mkdir: /usr/local/sbin: Permission deniedsbinの権限不足と言われているのでsudo make installを実行するとエラーがない状態で完了。
以下の位置に各種インストールされていることを確認。
/usr/local/sbin/zabbix_*  # Zabbixのagentとserverの実行スクリプト
/usr/local/share/zabbix/externalscripts
/usr/local/share/zabbix/alertscripts  # アラート用スクリプト.
/usr/local/etc/zabbix_*  # 設定ファイル
zabbix serverの設定
postgresで設定したデータベース名、ユーザー名、パスワード(今回は使用してません)を設定する必要があります。
sudo vim /usr/local/etc/zabbix_server.conf
DBName=zabbix
DBUser=zabbix
#DBPassword=
zabbix serverを起動する
共有メモリ不足で即落ちするのでカーネルパラメーターをいじってから起動する。
sudo sysctl -w kern.sysv.shmall=2097152
sudo sysctl -w kern.sysv.shmmax=134217728
/usr/local/sbin/zabbix_server
必要であればzabbix agentの設定
今回のケースではzabbix_serverとzabbix_agentが同一ホストなので設定は必要ない想定ですが必要であれば以下のコマンドで設定ファイルを編集します。
sudo vim /usr/local/etc/zabbix_agentd.conf
zabbix serverを起動する
以下のコマンドで起動する。
/usr/local/sbin/zabbix_agentdapacheのインストールと設定
後述のZabbix web interface 構築で必要なapacheの設定を行っていきます。
Mac標準のapacheだとPHPが削除されておりWebGUIを動かせないのでまずはinstall
brew install [email protected]
PHPが使えるようにapacheの設定ファイルに以下の編集を実施します。
sudo vim /opt/homebrew/etc/httpd/httpd.conf
# Dynamic Shared Object (DSO) Support
#
# To be able to use the functionality of a module which was built as a DSO you
# have to place corresponding `LoadModule' lines at this location so the
# directives contained in it are actually available _before_ they are used.
# Statically compiled modules (those listed by `httpd -l') do not need
# to be loaded here.
#
# Example:
# LoadModule foo_module modules/mod_foo.so
#
+ LoadModule php_module lib/httpd/modules/libphp.so
#Listen 12.34.56.78:80
#Listen 8080
Listen 80
+<FilesMatch \.php$>
+ SetHandler application/x-httpd-php
+</FilesMatch><IfModule dir_module>
- DirectoryIndex index.html
+ DirectoryIndex index.html index.php
</IfModule>その後document root直下にzabbixというディレクトリを作り、zabbixの必要資材を持っていきます。
sudo mkdir /opt/homebrew/opt/httpd/zabbix
cd /Users/ibsen/zabbix_install/zabbix-6.4.10/ui
sudo cp -a . /opt/homebrew/opt/httpd/zabbix
Zabbix web interface 構築
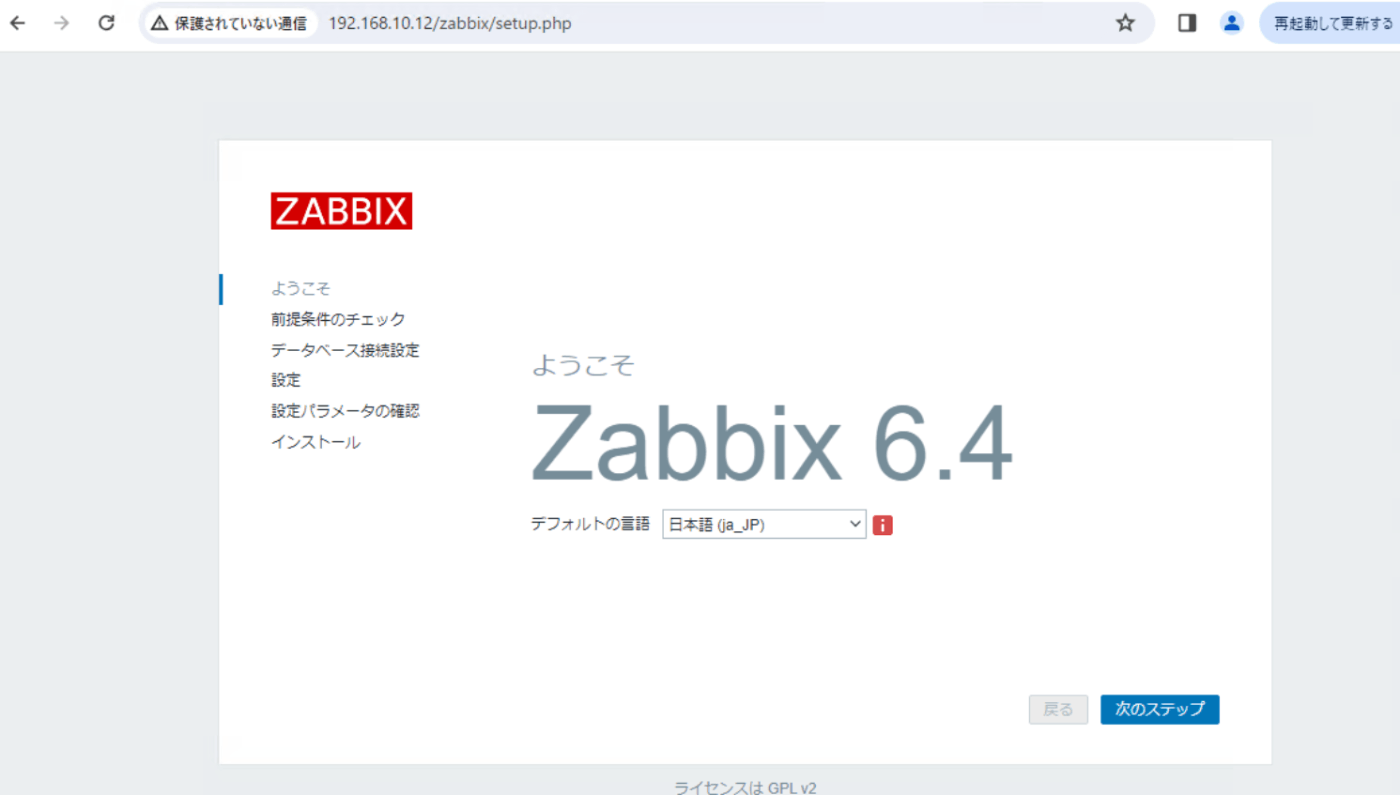
WebGUIでの設定を行っていきます。
ブラウザを開き http://localhost/zabbixにアクセスするもしPHPファイルで permission denied エラーが発生
以下コマンドでownerを変えて解決sudo chown -R _www:_www /opt/homebrew/var/www/zabbix

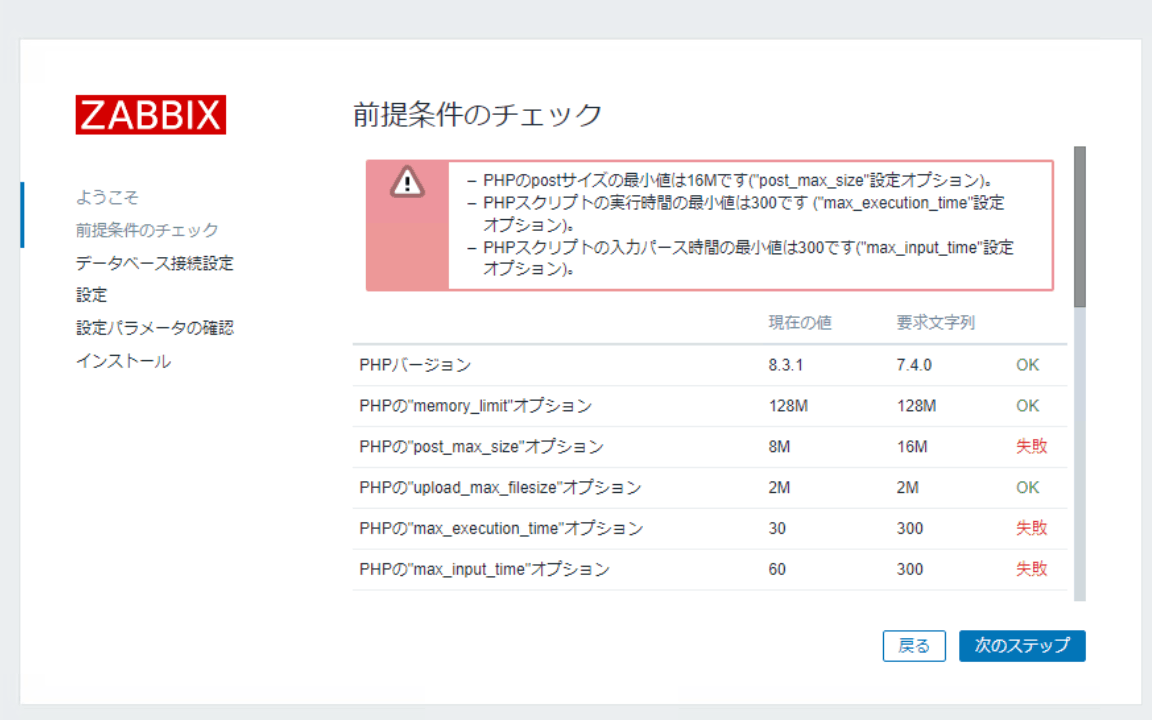
zabbix見れるがphpの要件失敗。以下のコマンドで修正していくsudo vim /opt/homebrew/etc/php/8.3/php.ini

後は設定項目に従い、今まで設定した値を入れていくとzabbixの構築が完了です。
最後に
OSによってはパッケージが無かったりするので今回みたいな面倒なソースインストールが必要ですがconfigureにもmake installにもログという手掛かりがあるので地道にやっていくしかないです。
またzabbixの構築は出来ましたがより便利にしていきたいので
- 設定ファイルがgitで特定のbranchにpushされたら自動で差し替えてプロセス再起動するようなCI/CD
- slackに通知する仕組み
を記事に残していきたい


コメント